Sunday, 19 July 2015
Dictation buffer updates
It’s been a little over a year since I started using Dragon Medical in Windows as a dictation buffer for my Mac. Please see my previous few posts on the subject for some background.
Since then, I’ve eliminated pain points and added features which have made the dictation experience smoother and less infuriating. Once again, while this does not represent a turnkey system, in keeping with the DIY nature of such projects, hopefully it may help others out who want to do something similar. The code remains up to date on GitHub and I plan on maintaining it for my own use until something better comes along.
So, here’s a change log in approximate chronological order:
Better microphone status
As you may recall, I find the DragonBar distracting in its various forms and keep it hidden most of the time. One thing that does need to be visible, however, is the microphone status. I had originally used Growl to display notifications when the microphone was turned on and off, but I have since set up a combination of Python and AutoHotKey which monitors the Dragon microphone status and displays an overlay window on the Windows side when both Word is in front and the microphone is disabled. (While AutoHotKey is a complete mess, it reminds me a lot of OneClick on classic Mac OS; I do wish something like it were still available for persistent script UIs on the Mac).
Here’s how it looks in practice:

An even more minimal dictation surface
With some more Word macro work, I’m able to use Word’s full-screen mode rather than auto-hiding the ribbon. Now the only vestige of an operating system and full-featured word processor behind my dictation buffer is a vertical scrollbar (which I could disable if I really wanted) and a couple of pixels at the bottom of the screen where the autohidden taskbar lives. For Word’s full UI back, just press Esc; for a return to minimalism, I’ve added “Full Screen” to Word’s Quick Access Toolbar where it’s accessible via Alt+1.
Working with Citrix Viewer
While dictating into native Mac apps is great, most of the work I do these days is in our electronic medical record, which is accessible either via Citrix Viewer or VMware Horizon. One advantage of Citrix Viewer is that it presents the remote application as individually movable windows. There is still an underlying Windows desktop so many of the same issues exist as in similar solutions such as VMware’s Unity (of course Citrix long predates Unity), but overall it is usable. Since getting a larger (2560×1440) monitor at home, when dictating into the EMR I typically configure my desktop with three side-by-side windows: the main EMR window, my current note and the dictation buffer. Previously I had an older 1680×1050 display and used my iPad for the dictation buffer, but more about that later.
The next problem is getting text from the dictation buffer into Citrix Viewer. Service support would be great, but there isn’t any, so instead I just use the existing clipboard bridging functionality and synthesize Ctrl+C and Ctrl+V. Pasting into Citrix Viewer is the easy part; copying into the buffer is harder because the Mac clipboard doesn’t immediately update with the Windows clipboard contents. I just have to poll the clipboard until something happens — ugly but effective.

You may wonder why I go to all this trouble when I’m ultimately dictating into a native Windows app with Windows dictation software. The short answer is that the app and dictation software can’t run on the same computer. As has been the case in several hospitals in which I have worked, our fat-client EMR doesn’t actually get installed directly onto individual client devices either inside the hospital or out, so a local copy of Dragon needs to understand how to get through to the application running on the remote host. Prior versions of Dragon Medical and Citrix would work directly with one another, but this is no longer supported. The currently supported method for dictating into Citrix is vSync, which involves an agent on the Citrix server that talks to the Dragon client. Unfortunately, vSync isn’t supported with non-networked versions of Dragon Medical (such as the one I own). Even with vSync, things aren’t perfect — after our recent Dragon and EMR upgrades, text I’m dictating often fails to display at all until I use the mouse or keyboard to update the screen.
Dictating into Fantastical
My fellow residents and I receive some scheduling information every month in a Word document. It’s nice to look at but not too useful in practice. It’s faster to dictate this information into Fantastical in order to convert it into calendar entries than to try to reformat it manually.
But now I can easily dictate into Fantastical's natural language parser, I’ve found it useful day-to-day as a simple version of Siri for the Mac. With an AppleScript you can tell Fantastical to parse sentence, and it'll open the Fantastical window with your dictation pre-populated.
Using RDP rather than the VMware Fusion console
While overall I really love VMware Fusion and appreciate its continued development and refinement, there are a few issues which have made it frustrating to use for this project.
First, there’s a substantial delay associated with relaying audio to the virtual machine, which notably slows dictation response. On my MacBook Pro I map my USB headset's dongle directly to the virtual machine to eliminate this delay; on my Mac mini I can't do this because I like to use the headset for Mac stuff such as listening to music at the same time. The current preview version of VMware Fusion claims to have improved audio for conferencing purposes, which I assumed would address this latency, but unfortunately I don’t notice a difference.
Second, the VMware Fusion window can sometimes lag and hang during dictation. (I'm not using Unity mode, as full-screen Word in Unity would consume the entire host entire Mac screen.) I don't understand why it's happening, but I stumbled on a workaround while getting the dictation buffer onto my iPad. I had originally used VMware Fusion's VNC support to do this, I eventually realized I could use RDP instead. With Jump Desktop on both Mac and iOS, Word became more responsive than it ever was on the console. So I now launch the VM headless and connect to it via RDP; audio, either via the VMware audio driver or USB redirection, remains independent of where the desktop displays. This has further advantages including letting me configure multiple RDP settings for varying desktop sizes (smaller or larger to fit with host applications, or big for development), rather than having to resize the VMware Fusion window, as well as letting me quit Jump Desktop and pause the VM to save battery power on my MacBook Pro when I'm not dictating. I have not tried using RDP’s own support for audio recording redirection, which Jump Desktop doesn’t support. (My scripts will still work with VMware Fusion directly if Jump Desktop isn’t running, however.)
Supporting rich text
Until a few weeks ago, input and output with the dictation buffer was limited to plain text. However, VMware Fusion, Jump Desktop and Citrix Viewer all support bridging an RTF clipboard between Windows and the Mac. So, I’ve added bidirectional RTF support to the dictation server, Mac services and command line tools. This involves using the Windows clipboard as there's no way via COM to extract RTF (or anything but text or XML) from Word on Windows. Right now, I only return either RTF or plain text, not both, based on whether you have styled your Word document at all; primarily this is so that all your Mac apps don't end up with unwanted 11 point Calibri text. Figuring out whether a Word document is styled was actually quite difficult (doing something logical like enumerating style runs doesn't work, because each paragraph gets its own run), and I end up doing it by rudimentary parsing of the document's XML looking for character and paragraph styles. pbpaste -Prefer rtf is broken at least in 10.10, so I also implement some direct Mac clipboard setting support for RTF only.
Another video
I’m working on another video to demonstrate these changes; I’ll re-record it when I get a chance.
Plans for the future
In no particular order, some further improvements I’ve been pondering...
- I often end up with a number of auto-recovered documents which I wish would go away. I try to close my temporary dictation documents without saving, however I do want to preserve their contents in a crash, so I may consider enumerating these documents on Word launch and deleting those which contain no text — assuming I can do this from the COM interface.
- Word’s full-screen mode sometimes doesn’t measure the screen correctly with an auto-hiding taskbar, so you end up with a taskbar-sized strip of desktop background at the bottom of the screen. This appears somewhat related to the way in which I try to launch Word via COM; Windows is far more aggressive about preventing focus stealing than I realized — certainly more than the Mac — to the point that even when acting as a pseudo-user in automating the user interface, it Can be difficult to give a newly opened window focus, and the taskbar ends up staying focused. In any case, it should be easy enough to detect when Word’s window is the wrong size instead of just fixing the problem manually (move pointer out of taskbar area if necessary, then press Esc and Alt+1) when it happens.
- I’d like to be able to use VMware Horizon; while it’d mean some wasted screen space with non-floating EMR windows, it opens up a unique possibility. VMware Horizon supports multiple protocols — PCoIP and RDP. While the PCoIP client is built into Horizon Client on the Mac, it will launch Microsoft’s now-obsolete Remote Desktop Connection app, if present, to connect via RDP. RDP supports virtual channels; much like what Citrix uses for vSync, except that since I can run arbitrary Windows apps on the virtual machine rather than just the EMR-in-a-bubble as with Citrix, I could directly manipulate the Windows clipboard on the remote machine. I’d need to write an app to impersonate Remote Desktop Connection which converted its settings files into Jump Desktop ones, a virtual channel plugin for Jump Desktop for Mac and the virtual channel server on Windows. If successful, this would both avoid polluting the Mac clipboard and make the whole process more reliable and controllable than its Citrix equivalent. But my current setup has become a lot more reliable recently, so it may be way too much work for too little benefit.
- Speaking of reliability, I want to eliminate my reliance on NatLink. It's big, old, crufty and sometimes hangs when I try to connect to it (though much less frequently since I don’t do so as often), forces my server to be single-threaded, and if I could figure out how to interface directly with the Dragon microphone objects directly from Python or even my own C++ code, I could get rid of it completely. I also suspect some of the random-appearing hangs I'm seeing while dictating are NatLink’s fault, too, as they don’t happen when using Dragon at work.
On the other hand, my open source Mac apps need to be updated for El Capitan…
 10:34 PM
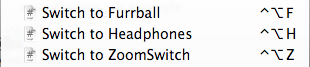


 4 Comments